Pages

Tampilkan postingan dengan label space. Tampilkan semua postingan

Rabu, 25 Mei 2016

D is for Decorator Letters

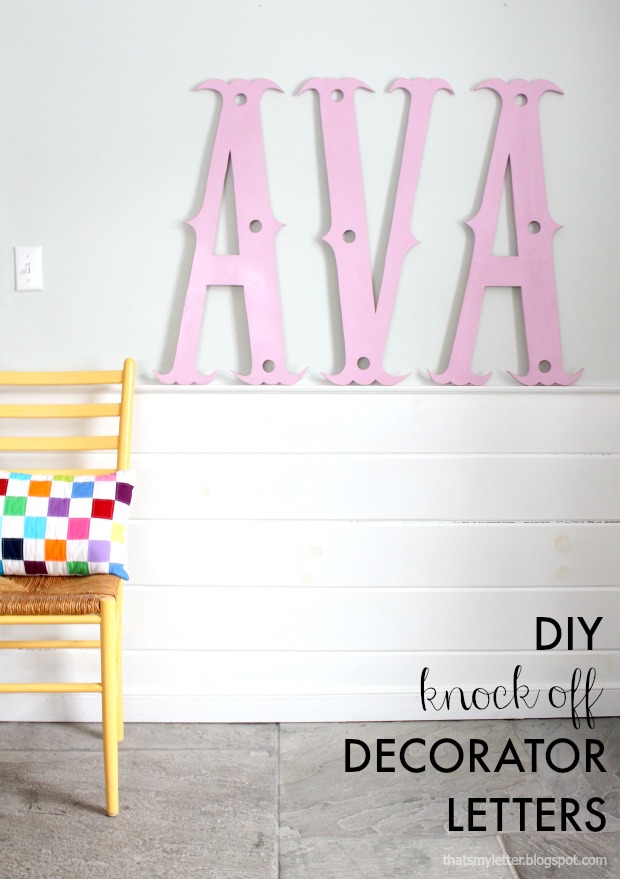
diy knock off decorator letters

Grab your jigsaw and some plywood because you can definitely DIY these decorator letters.  They make a huge statement for very minimal cost (and a fun birthday gift for my daughter's friend too!).
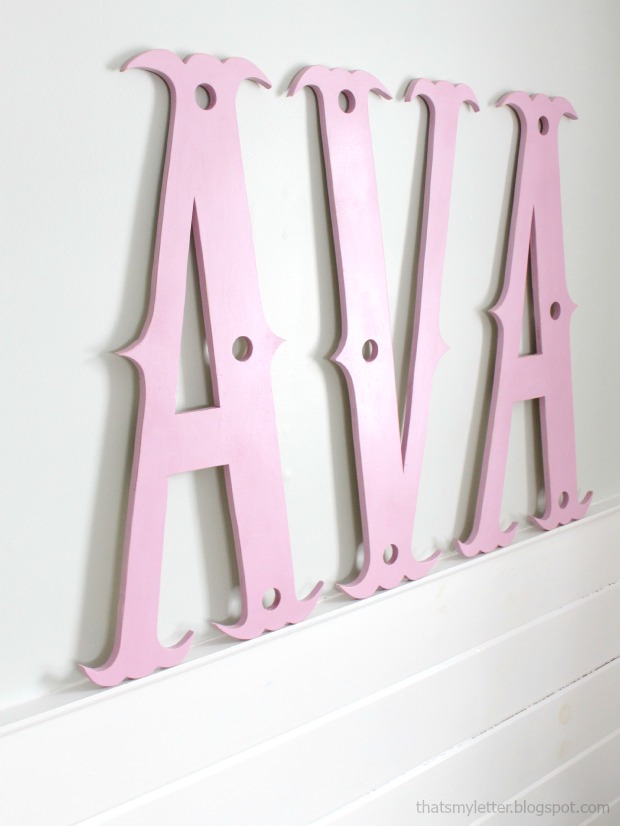
diy knock off decorator letters

Inspired by Pottery Barn Kids Decorator Letters:
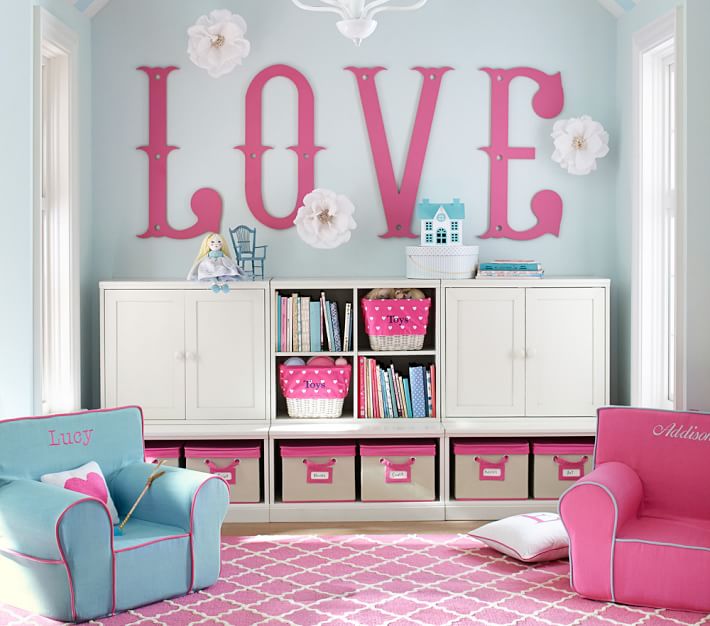
Pottery Barn Kids decorator letters

image source

Their letters cost $79 each, that's crazy talk too me!  (To do the math 4 letters would be $316 - are you kidding?)  I used 1/2" plywood scraps to make my version but all you need for one letter is a 1/2" plywood handy panel (2' x 4') which runs about $15.  You might even be able to fit two letters on one panel if you're lucky.  Also you could use 1/2" MDF which is cheaper and makes those curvy cuts super smooth.
Click here to continue reading »
Read More..

Jumat, 20 Mei 2016

W is for Wallpaper Wall Art Giveaway

diy wallpaper wall art (and a giveaway too!)


Wallpaper makes an easy solution for adding pattern and texture to your wall and you don't have to wallpaper the whole wall either.  I was challenged by the folks at Porch.com to make something fun and creative using wallpaper for a pattern play project.  And I actually came up with two projects: wallpaper wall art and wallpaper flower bouquet.


If you're not familiar with Porch.com yet they are a home network with connections to accredited home improvement professionals.  It is a giant information source for all things home and DIY, definitely check it out!

Porch.com teamed up with Scout & Nimble to supply us with wallpaper and I choose this Graham & Brown Kensington English rose pattern:  


Originally I never planned on coloring the flowers however when the wallpaper arrived all the beautiful black and white hand-drawn details had me looking at this paper like a coloring book.


Click here to continue reading »
Read More..

Selasa, 26 April 2016

L is for Loft Space Makeover

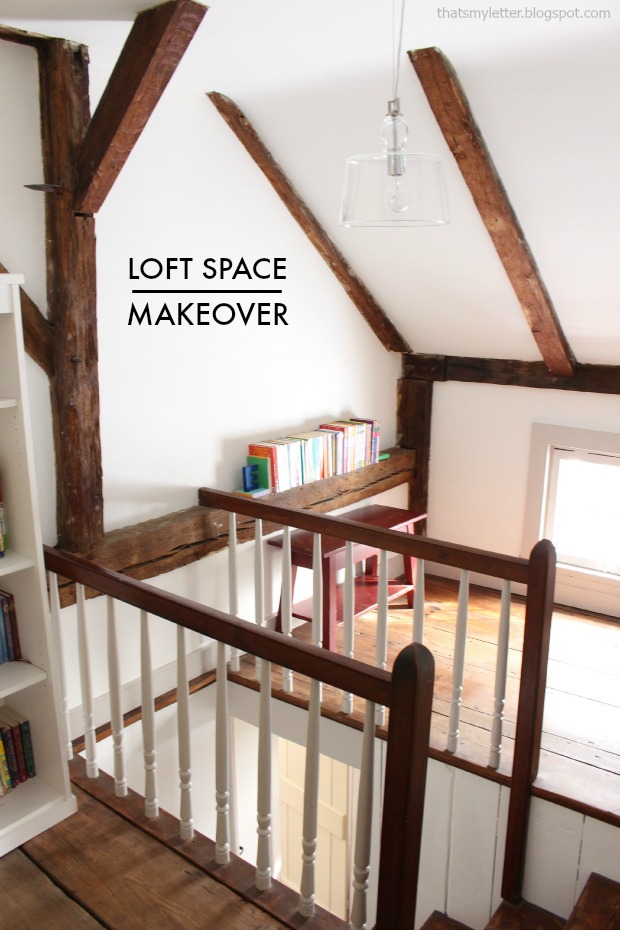
loft space with ceiling beams

Another peek into our home today and we're up on the second floor in the loft space.  Two weeks ago I shared the backstairs and upstairs hallway space and that leads us to the front stairs and loft space.


To be honest this makeover really only needed paint and a new light fixture.  Unfortunately I don't have a before picture of the light but it was straight from 1984 with smoky glass and actually came down shortly after we moved in 18 months ago because I couldn't live with it.


Today the space is bright and fresh and clearly the highlight here are those exposed wood beams which are about 275 years old.  (Our house was built around 1740.)  I painted the walls Benjamin Moore simply white and the trim is London Fog.


That one horizontal beam makes the perfect ledge for books.  I used the kids diy book ends from Emma's build it birthday party here to hold up the books.
Click here to continue reading »
Read More..

Kamis, 21 April 2016

L is for Loft Bed with Lego Storage Work Space

diy loft bed with lego storage and work space


A giant build to share with you today thank you to my fellow buildy blogger Jen at House of Wood, she put together the plans for this awesome loft bed with lego storage and work space!


My son was begging for a loft bed and I wanted to make the most use of the space below by designing the bed to fit 2 Ikea Trofast storage towers underneath for legos.  Plus a lego workspace where he can leave out his incomplete projects without cluttering up our Family Room.


The work space is very generous (the table here measures 32"w x 48"l),  Jen's plans make use of the whole width under the bed.  Our table is slightly narrower because I used a scrap piece of plywood and also it does leave a bit of space on the ladder side for feet to poke through.

I put felt on the bottom of the table legs so it easily slides out into the room for more maneuverability.

Click here to continue reading »
Read More..

Senin, 18 April 2016

How To Create The Perfect Meditation Space In Your Home

Those who know me well know that I suffer from generalized anxiety. Yup! Im an anxious person. I cant help it, I didnt ask for it, and for the most part I sure dont enjoy it, but its there and I have to live with it. Im the type of person who tries to take something negative and turn it into a positive, so I will admit that over the years Ive been pretty crafty with my tendency to be anxious, and I have often tried to creatively use it to my advantage. Given that its not overwhelming, some anxiety can keep me on my toes, help me be more productive, expand my thinking, push me to be competitive (even if its just with myself) it also leads me to be a bit more of a perfectionist with my work, and makes for some pretty interesting creative writing and heartfelt poetry.

But things that are tightly wound need to unwind, and even though there are a myriad of medications that you can take to help with anxiety, anyone who suffers from anxiety should know first and foremost any med-free ways that they could possibly help themselves. Deep breathing and meditation are two perfect examples. I probably could write forever about this topic (and I will probably write more about it in the future), but Im going to get to the topic of this post, which is how meditation can be beneficial to you, and how to create the perfect meditation space in your home.


Why meditate?
The amazing thing about meditation is that it is for everyone. Anyone can benefit from meditation, no matter who you are, no matter your age, or what type of work you do, none of that matters. Meditation is for everyone.


https://www.pinterest.com/pin/45880489926652846/


Most of us are constantly plugged in. We live in an era of being socially connected through technology and that is only going to increase over time. For all of the time that we spend plugged in, we need to increase our time that we spend unplugged. Kids today grow up with technology. They are born plugged in. Meditation is a powerful technique that you can teach your children to do early in their lives as a preventative measure to help counteract and deal with stressors that they will face throughout their lives.

Meditation is free and accessible. You dont need to drastically change your lifestyle to meditate. It costs nothing, you dont need to become a vegetarian or join a particular religion or anything like that. Dont know where to start? Check your local library for books, or even easier, go to Pinterest or Google for some quick starting advice. There are tons of guided meditation videos for free on YouTube to help get you started. As for finding the time to meditate, one of the best things to do is make it a part of your daily routine. Just as you set aside a few minutes every day to brush your teeth, it is just as easy to set aside a few minutes to meditate every day. Make it a part of your daily routine. Try first thing in the morning, or in the evening. Whatever works best for your schedule. Dont think you have time? Yes you do! If you have time to spend on Facebook or surfing the net, then you have time to spend on yourself. You have time to meditate!


 :


"You should sit in meditation for 20 minutes a day, unless youre too busy; then you should sit for an hour."   
 - Old Zen saying

One thing thats great about meditation is that you cant fail at it. If you find your mind wandering to that grocery list, just try to refocus and get yourself back on track. Dont worry about messing up. Results are nearly instant. You should notice a difference pretty soon after you start meditating. Within a few weeks you may notice that you are calmer, you have more energy and greater clarity, and have better control over your thoughts and emotional responses. In your everyday life you may notice decreased anxiety as well as sharper thinking skills.

First and foremost, meditation should be accessible. There are great pros to setting up a meditation space in your home, but keep in mind that you dont want to create a barrier (too much of an attachment to one space) which could deter you from meditating anywhere besides your meditation space. On a beautiful warm day, meditate in a park, the forest, or your own backyard. Keep meditation accessible. But today we are going to start with creating a little meditation space in your own home to get you started. Once you are in the habit of meditating and become more skilled in your meditative practices you may then want to try meditating outside and in places other than your home.

What is a meditation space?
A meditation space is an area in your home where you will meditate. Pick a spot that is quiet and peaceful, and that you can personalize.


Why create a meditation space?
Do you need "things" with you to meditate? Absolutely not. All you need to meditate is yourself. As a matter of fact, too many objects can be distracting. But having a special spot, especially when starting out, can be inspiring for you and can give you that encouraging little nudge to make meditation a daily habit. A meditation space serves as a sanctuary, an inspiring reminder that meditation is a part of your daily life, and creating a space that is purposefully peaceful, comforting and relaxing can make your meditative practice even more enjoyable. 

Check out these inspiring ideas, and use them for springboard to create your own peaceful meditation space. (click each photo for original source)


Mat, candles, mirror, plants...this looks like a tidy personal space


A cozy & colorful outdoor patio space


A peaceful companion - koi in a large jug with aquatic plants and river stones


Pillows and that window!


Peaceful candles glow


A breezy and open area with lots of plants


I love the scarves, curtains, and lights. This is a truly personal space!


Cozy and moody


Colorful bohemian style


Remember, there are no rules except for the ones that you create yourself! Here are some items that you may want to consider including in your space:
  • A cushion 
  • A mat or rug
  • Something from nature; plants, stones, crystals, sand, pinecones, etc.
  • Candles
  • Incense

Enjoy your day!
Love, 
Laura


My broken china jewelry is always available for purchase at https://www.etsy.com/shop/dishfunctionldesigns

Read More..

Selasa, 12 April 2016

How To Make A GingerBIRD House


What do you do with that gingerbread house kit that you didnt have time to put together and decorate over the holidays? You turn it into a gingerbird house! This is a fun winter craft that is perfect to make on a snowy winter day. Everyone in the family can join in, and the supplies cost next to nothing. 

Here is what you will need:
Gingerbread house (you can also build one out of graham crackers)
A large plate
Small bowls

A butter knife or spatula
Peanut butter
Assorted snacks to adhere to the house:
Stale cereal, pretzels and crackers

Peanuts
Birdseed, sunflower seeds


If your gingerbread house is not yet constructed, it is best to first construct the walls and roof of your house and then allow it to dry overnight. I used classic royal icing to glue mine together (powered sugar and water mixed together to form a thick icing the consistency of brownie batter). I got my gingerbread house kits at my local grocery store around the holidays for about $5 each. This included only the gingerbread walls and roof parts and I had to make my own icing and construct it myself. You can also make your gingerbird house out of graham crackers, but the gingerbread is much more sturdy. Okay, so put together your gingerbread houses and allow to dry overnight, or if youre in a hurry, allow them to dry for at least 3-4 hours. 


Construct your houses on large plates.


Gather your small bowls. I picked a variety of pretty ones, just because I had them at home. 


Now fill your bowls with your stale snacks. Having the snacks in small bowls will help keep your work space neat and organized! These snacks are your building materials for your gingerbird house!


Another reason I like having everything organized in little bowls is that you can see everything out in front of you at one time, and this allows you to start to think creatively and plan in your head how you might use these materials.


I used cereal, some crackers and pretzel sticks, and popcorn. You can also use birdseed and peanuts. Be careful that you dont use anything that might harm wildlife. I stuck to grains.


Use your old peanut butter first!


Use the fanciest butter knife you have :) It makes it more fun! 


Completely cover the outside of your house with a coating of peanut butter. Use your butter knife to spread it on.

Here my house is completely covered with peanut butter. Now its time for the fun part! 

I started with the roof of my house. There is no right or wrong way to work. Start wherever you like. 

I couldnt resist putting the spikes on the peak of the roof. :)


I make a cracker roof. Next came the popcorn wall! 


The great wall of corn flakes.

The psychedelic wall of froot loops!


When finished, place outside. I landed up putting my gingerbird house in a hanging wire garden basket. Now wait and watch for it to be devoured! 

What do you think?

Enjoy your day!
Love, 
Laura

Pin this post!


Check out my new jewelry instruction books and DVDs!

   
Learn how to solder and make unique jewelry!


My broken china jewelry is always available for purchase at https://www.etsy.com/shop/dishfunctionldesigns


Read More..